Collaborative coding can be a fantastic forum for getting stuff done at the same time as learning programming techniques and getting to know other developers. I’ve been enjoying the recent Samman Society Ensemble sessions where we work on our website sammancoaching.org. Some of the participants have asked how I set up the shared ensemble machine that we use, so I thought I’d write up some instructions.
When you’re coding in an ensemble, about 4-8 people together, you’d like to frequently switch who has the typing role, to keep engagement high and get the benefit of everyone’s input. For this to work well it helps if the switching cost is a close to zero as possible. The best solution I’ve found so far is actually to use AWS AppStream. You set up a cloud machine running Windows or Linux and install an IDE on it. Everyone can access this machine from a browser, no need to install any other tool or client. Switching typist is just a case of calling out who it is, and they can begin using the machine immediately. Everyone can see what they are doing in their browser.
There are a few disadvantages though. Many developers are used to working on a Mac and don’t know the keyboard shortcuts for Windows or Linux. Some people experience a significant amount of lag especially if they are in a different part of the planet to the cloud machine server hall. It’s not free to run one of these machines, either, but the costs are a matter of a dollar or two per session. Overall, I find the experience is pretty good for everyone and a good compromise for an open ensemble with participants from around the world with different tool preferences. We all have a browser and everyone can code in an IDE on Windows even if it’s not their usual preference.
Steps To Create an Ensemble Cloud Machine
If you haven’t used AWS much before it can be a bit daunting because there are so many options. Let me take you through the steps to set up a machine for your ensemble. First a disclaimer – I’m absolutely not an expert with AWS and I don’t know if I’m actually using this tool the way the tool vendor intends. I am sharing what works for me.
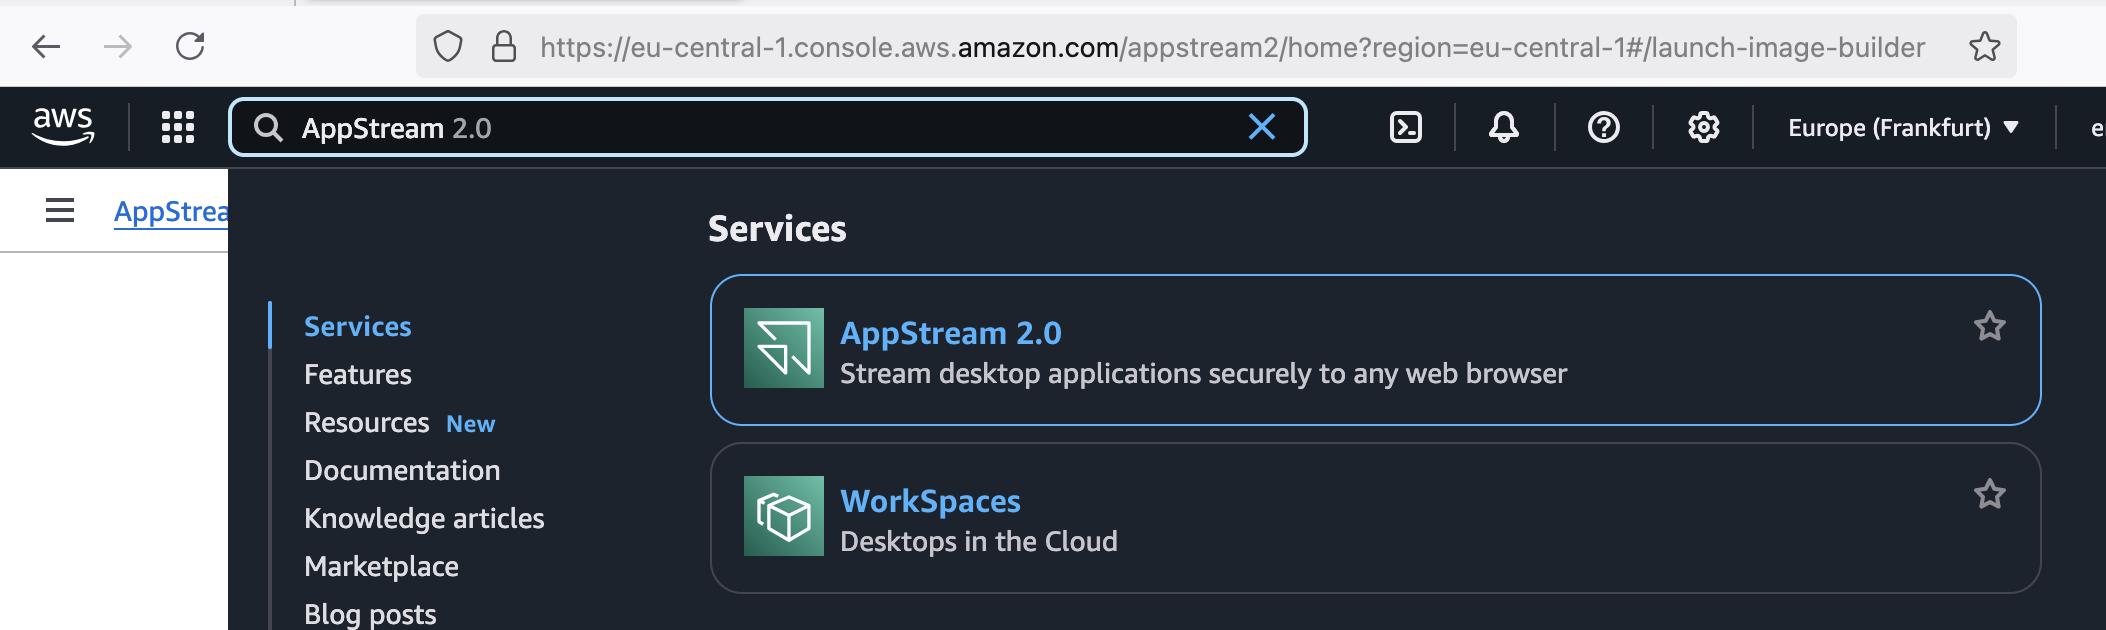
Once you’ve logged into your AWS account, you will want to open the “AppStream 2.0” console, you can search for it in the top left search box:
Inside AppStream there are lots of options on the left menu, for Stacks, Fleets, Images and more:
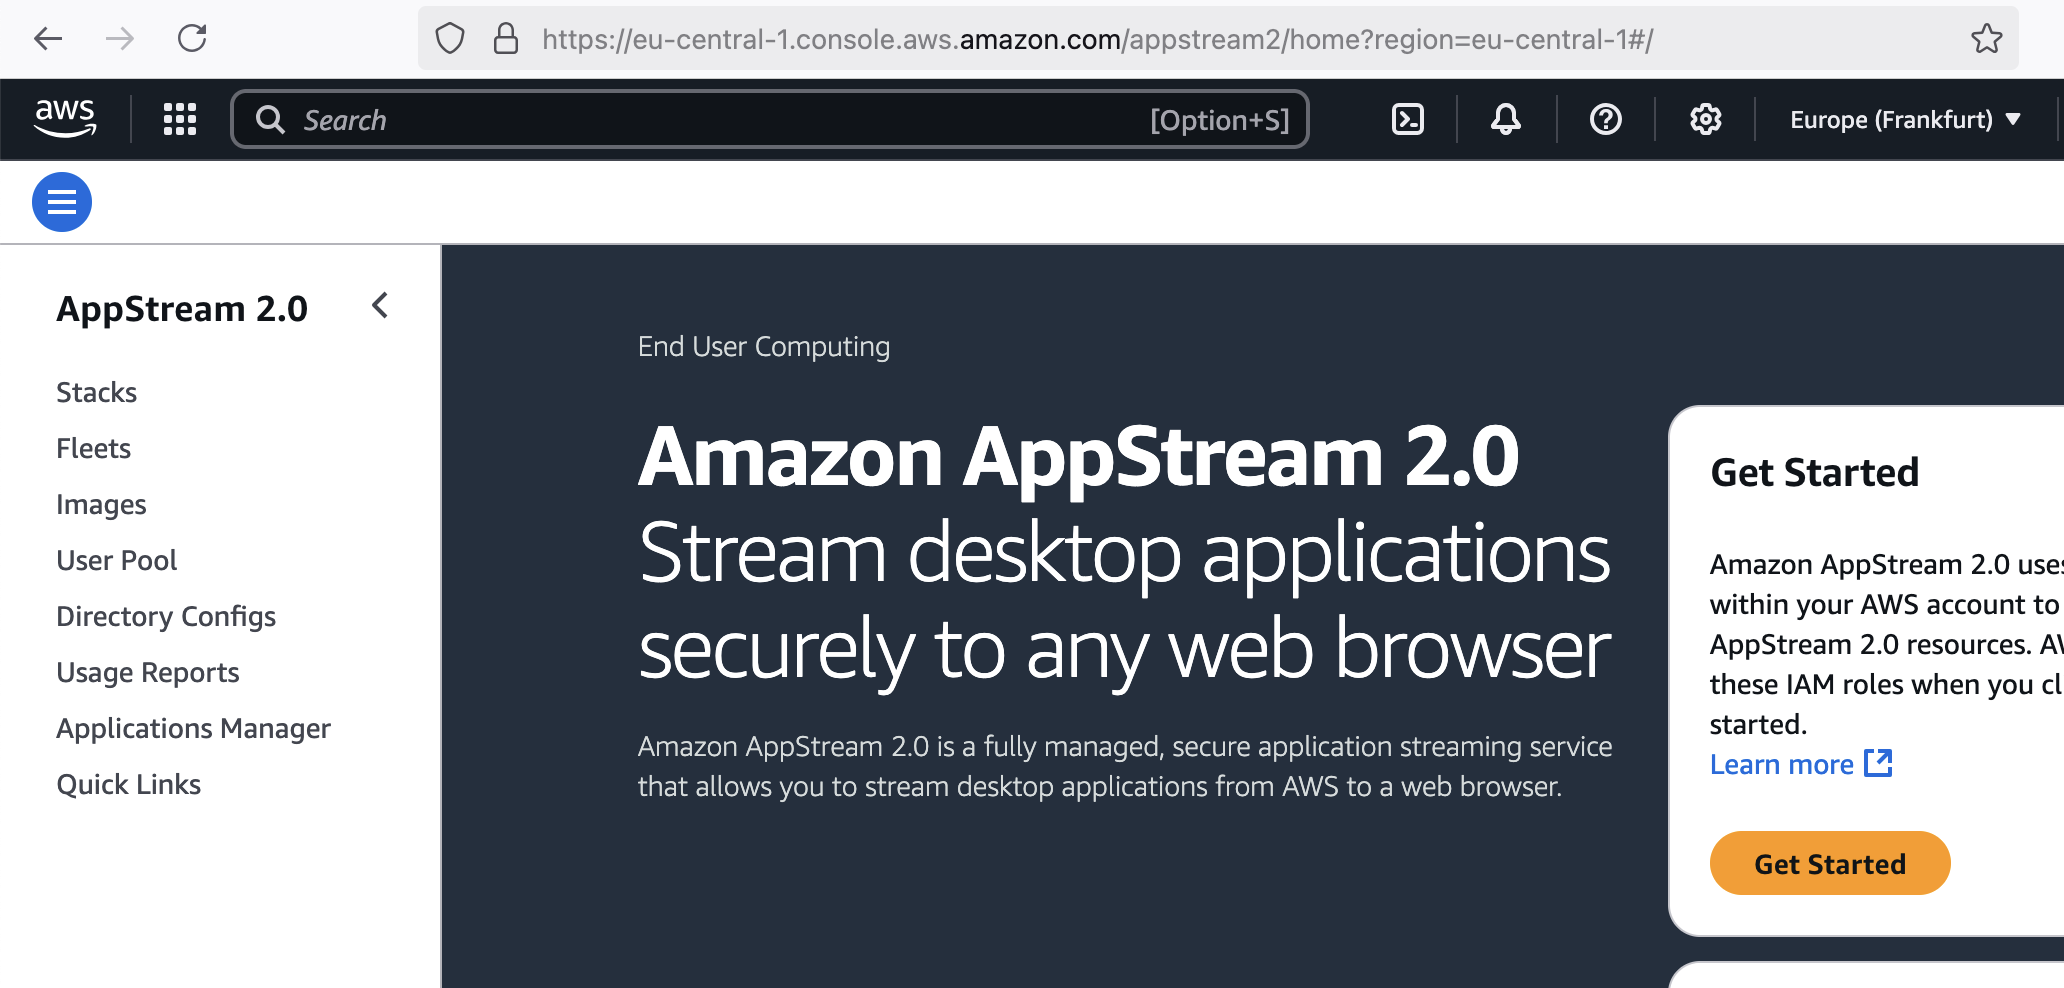
Honestly I really don’t know what most of those things are. The part I’ve used is ‘Images’, specifically the ‘ImageBuilder’ tab:
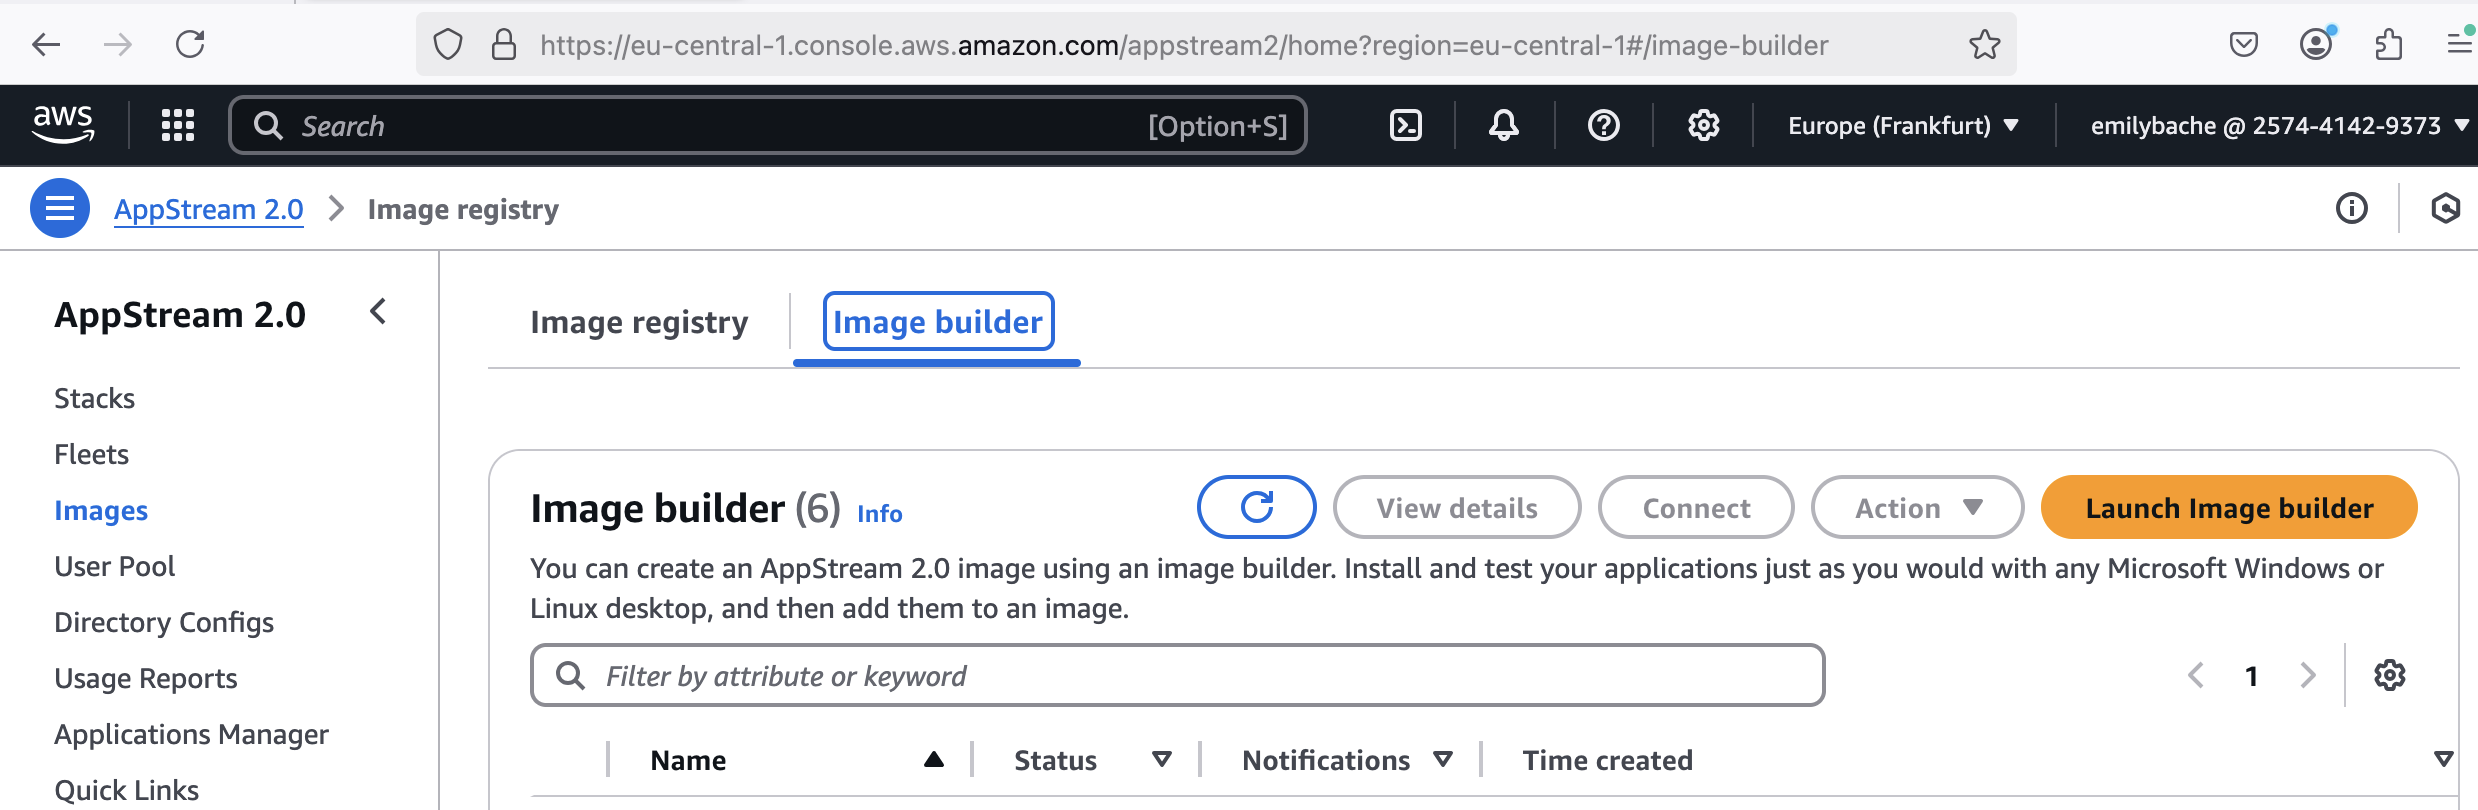
The button you want is the orange one on the right – ‘Launch Image Builder’ – that will let you create a cloud machine for your ensemble. This brings you into a four step process to define and launch your machine:
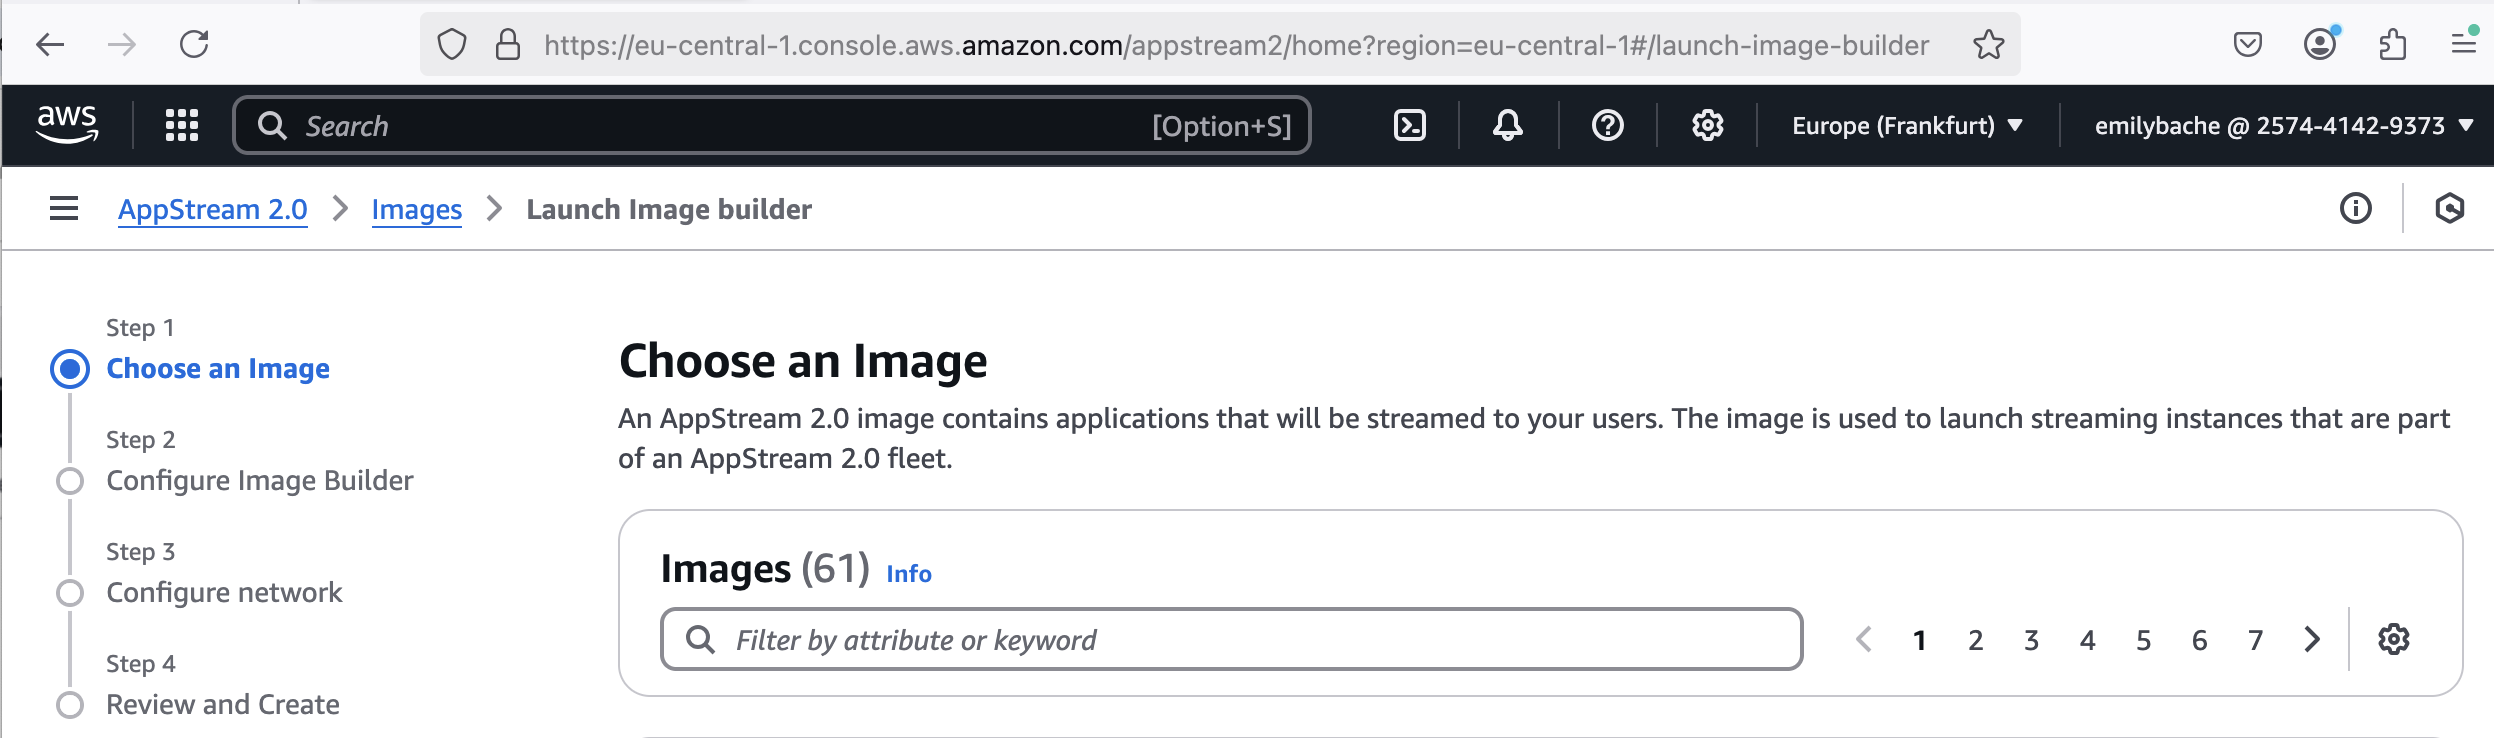
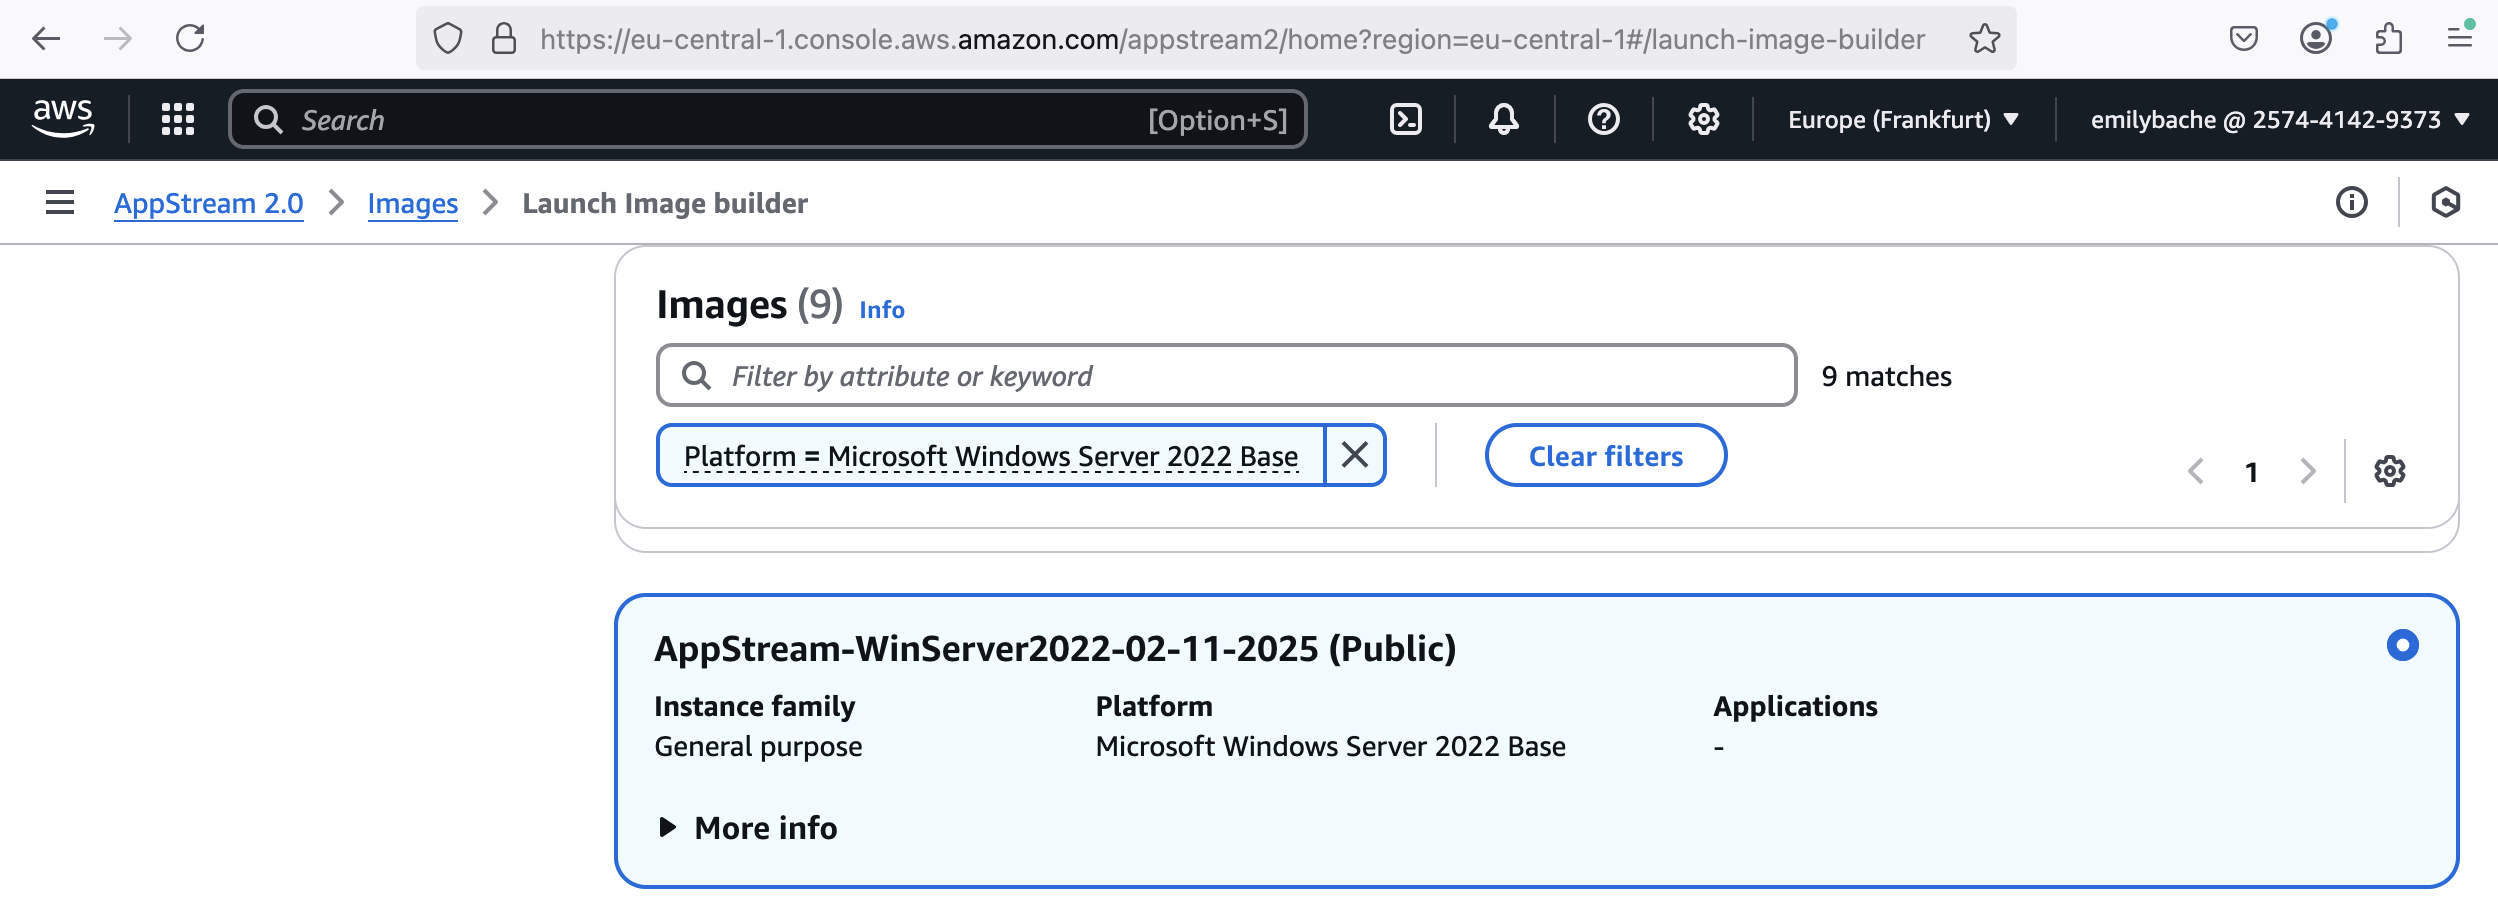
Step 1: Choose an image
There are a huge number of images to select from. I picked the most recent Windows Server image from the most recent base image. I’ve also had success with Amazon Linux images if you prefer that.
Step 2: Configure Image Builder
First you need to choose a name for your Image Builder – this needs to be unique and help you to remember what this machine is for. It’s hard to change this name later, so choose something descriptive. Then you need to select which size of machine to have:
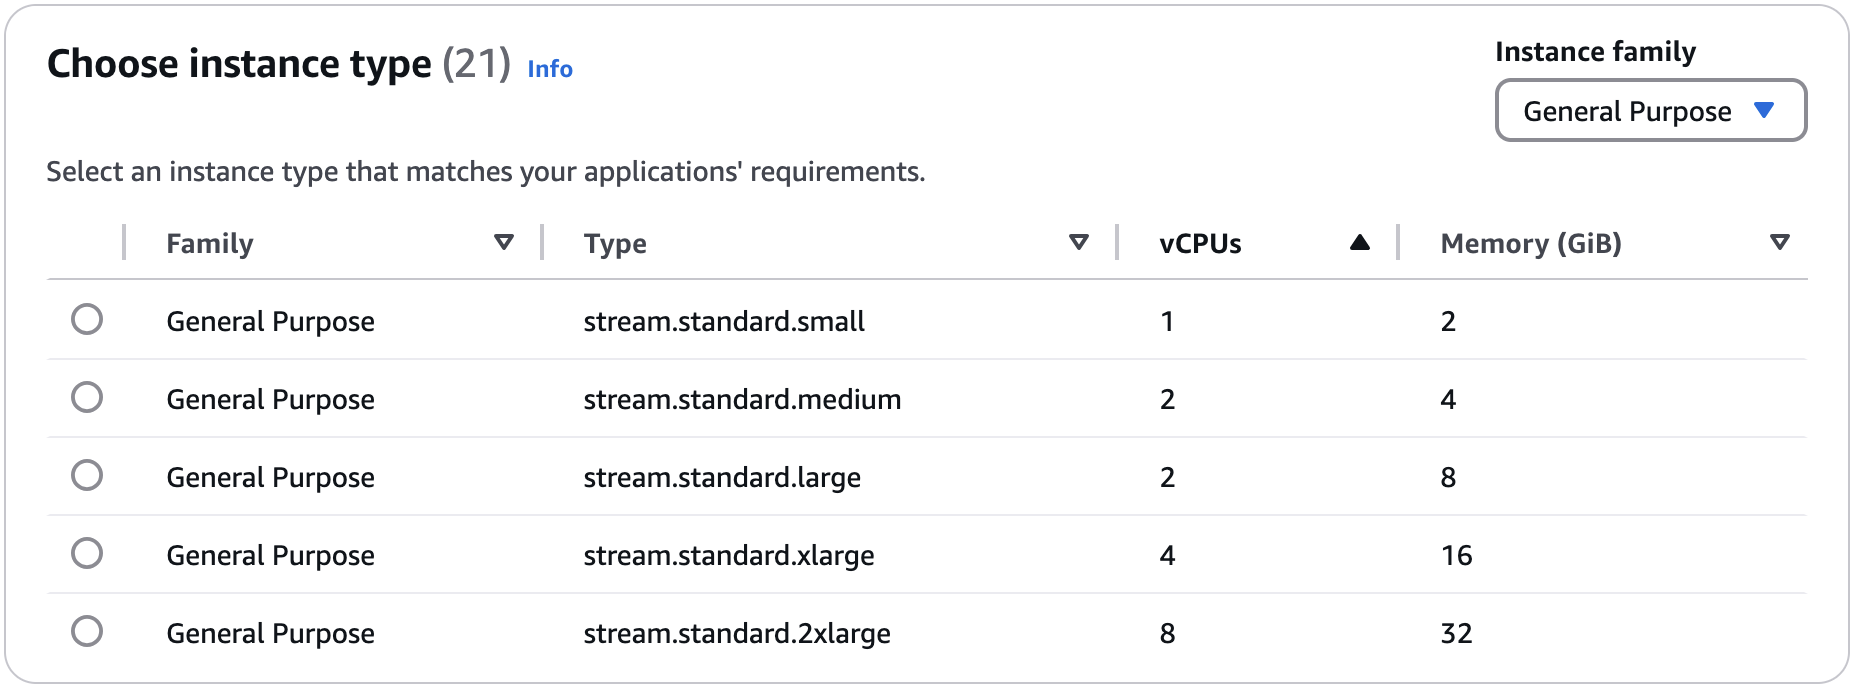
For a developer machine my instinct is to get the most powerful box available, although having said that I’m not sure how much difference it actually makes in practice. The lag in the network is probably more significant to how you experience the performance.
Step 3 – Configure Network
The essential step here is to check the box ‘Enable default internet access’ – without that your machine will be pretty useless for programming. You also have to select a subnet:

In my AWS region there are three subnets so I chose a random one. I honestly don’t really know what difference it makes. I also accepted the default security group, again I’m not sure what that does.
Step 4 – Review and Create
This page lists all the options you already chose, so you can check if you missed anything. Make sure you really did select “Default Internet Access Enabled” then hit the orange button to create your image.
Now it should appear in your list of Image Builders. It might be in a ‘Pending’ state for a few minutes while it gets created. Eventually you should be able to select it and press “connect” to launch it in a new browser tab.

Select ‘Administrator’ to log in with full permissions to everything and open the Windows desktop:
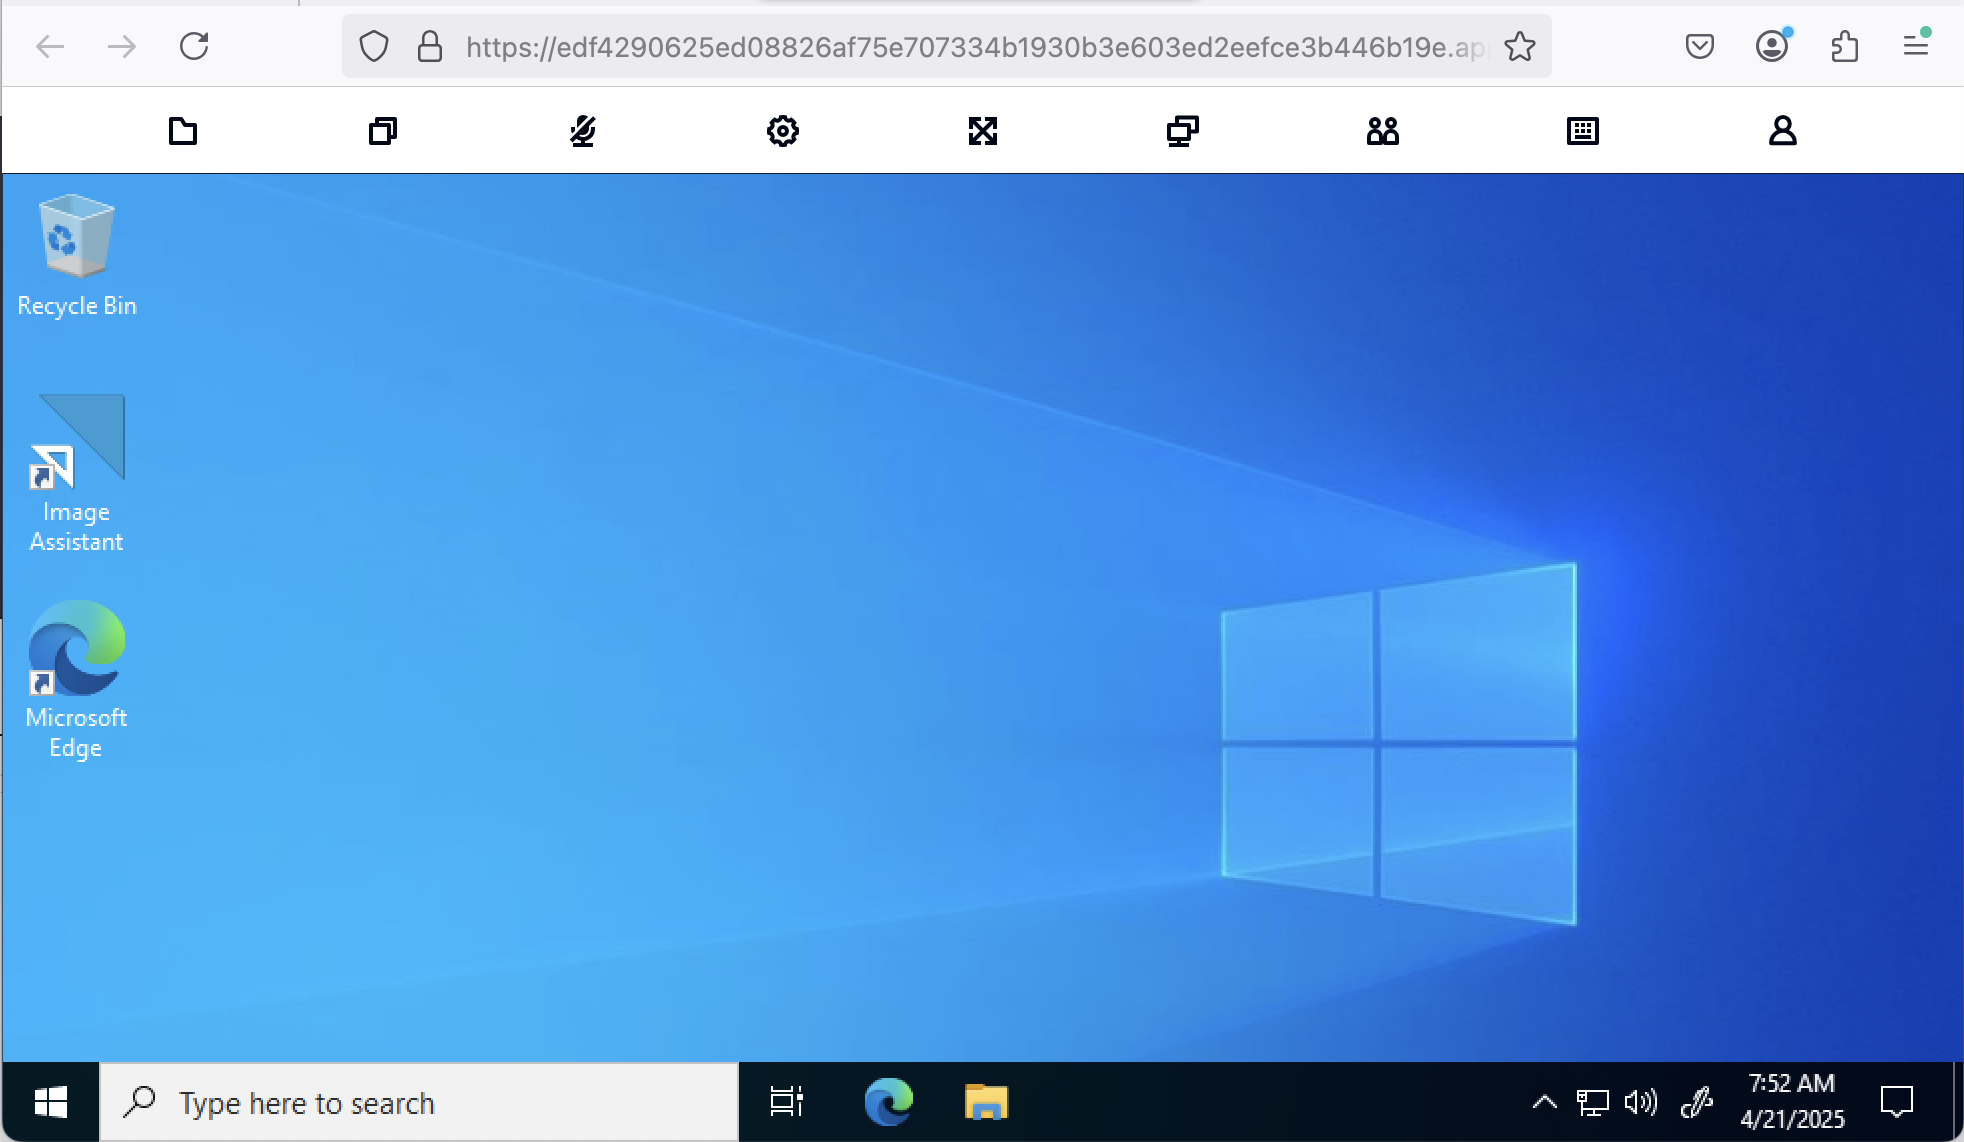
What you have here is access to a full windows machine through your browser. There is a extra menu along the top that you might need sometimes for accessing the machine’s clipboard for example. Honestly I’ve just found it completely intuitive and like a normal windows machine just in a browser. This is where you go ahead and install your usual development tools like an IDE, Github desktop and so on.
Once your new machine is all set up and ready to use, you can share it with the other members of your ensemble. The only gotcha here is you can’t just give them the same url as you’ve got in your browser address field. You need to go back to the AWS console and create a streaming url:
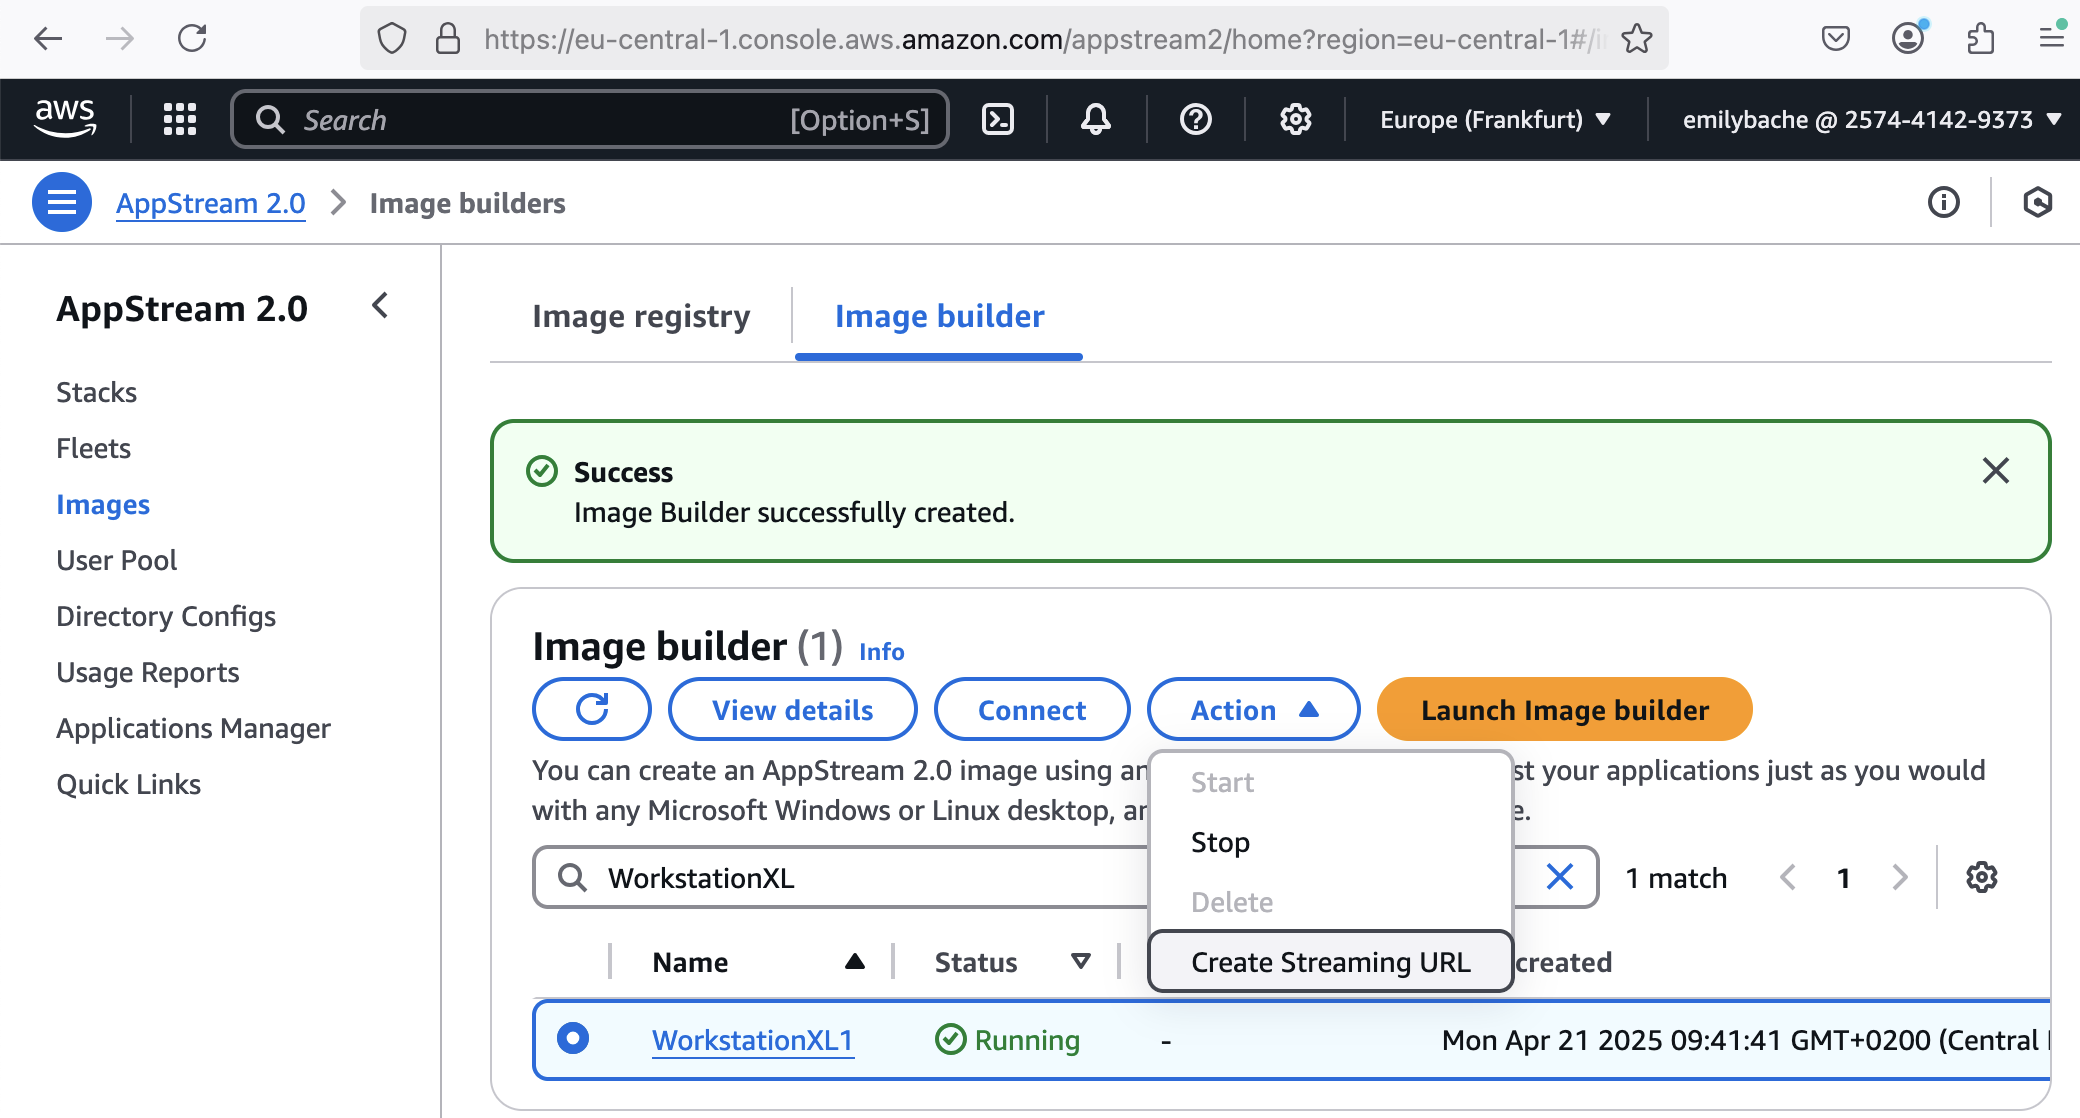
When you’ve opened a video meeting with the other people in your ensemble, put this Streaming Url in the group chat and they should be able to connect to it straight away. I’ve found that this url only works for an hour or so after you create it so if it doesn’t work, try creating a fresh one. Be careful who you share this url with – they will have full access to your cloud machine. On the other hand, they won’t be able to access your AWS console so the damage will be limited to this machine, which you can always delete and start over.
After your session when you’ve finished coding and pushed all your changes, you’ll want to shut down your machine. The costs of running these machines is relatively small, but it adds up if you leave your machine running all the time. Select “Stop” from the ImageBuilder Action menu. For your next ensemble, you can use the same ImageBuilder. Start it and create a streaming url to share when it’s ready to use.
Get Involved
I’d like to thank Llewellyn Falco for introducing me to ImageBuilder and for being a regular attendee at the Samman Ensemble. We are a community of Technical Coaches who aim to spread useful resources and support one another. If you’d like to support our work on sammancoaching.org and get involved in our ensemble, please join my Patreon which will give you access to our Discord server. The #samman-ensemble channel has all the details of when and how to join our meetings. In any case I wish you every success with your own Ensemble meetings.
If you have comments on this post – perhaps you’ve found a better way of doing this – you can find me on social media as ’emilybache’.


